Home

Copper-IUD Placement

Detailed instructions for placement of the various IUCs is provided in the subsections below.

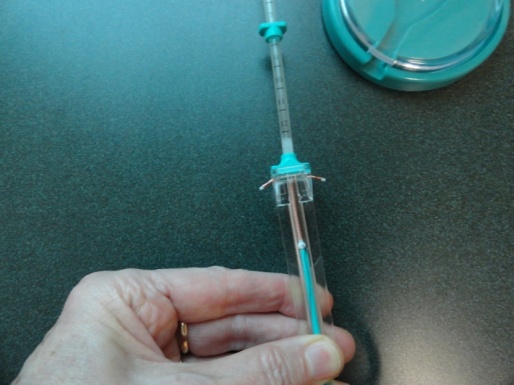
In general, a ‘No-touch’ technique (everything entering the cervix should be sterile and should not be touched) should be performed. Non-sterile gloves may be used provided nothing inserted beyond the cervix is touched.

The general steps of IUC placement are as follows:

  1. Perform a bimanual exam to assess uterine size and position
  2. Insert the speculum
    • Optional steps: STI screening, cleanse the cervix with antiseptic, cervical anesthesia
  3. Tenaculum placement
    • To reduce the angle of uterine axis, reduce difficulty of placement, and possibly reduce the risk of perforation, we strongly recommend the use of a tenaculum
  4. Sound the uterus, using a dilator if necessary prior to sounding
    • DO NOT open the IUD package until you have sounded the uterus successfully
  5. Insert the IUD as per product monograph (below)
  6. Trim the strings 3-10 cm from the external cervical os

SOGC: Quick reference on IUC insertion

Uterine Sounding

  • It is a critically important step that should not be avoided.
  • If you have sounded to <6cm, do not insert the IUD as you have likely not sounded to the fundus of the uterus
  • If you have sounded beyond 10 cm or there is no resistance felt, STOP and consider perforation

Fast Facts

Sound BEFORE opening IUD/IUS packaging to avoid contamination and delay in obtaining a replacement if a second attempt for placement is required.

7 Steps to sounding the uterus

  1. Insert speculum to visualize the cervix
  2. Cleanse the cervix and vagina with antiseptic (optional)
  3. Apply tenaculum to the cervix (using anaesthetic if indicated)
  4. Gently pull the tenaculum to align the uterus, cervical opening and vaginal canal
  5. Insert the sterile sound into the vagina and through the cervical opening. Warn the woman about an increase in discomfort as the sound reaches 4 cm, or as the internal os is passed.
  6. Advance the sound into the uterine cavity until a slight resistance is felt (at the fundus)
  7. Withdraw the sound and determine depth of uterus by direct visualization

IUD PLACEMENT - Liberté UT ®/Nova T ®/ Mona Lisa 5®

  • Pull string down so that arms are enclosed in insertion tube (ensure arms parallel to axis of flange)
  • Set the lower end of flange to correspond to the sound measurement
  • Insert rod (plunger) into insertion tube
  • Insert until flange is at the cervix
  • Pull the insertion tube back to upper edge of line or ribbed section on the rod (plunger)
    The arms are now released
  • Advance to fundus until the flange touches the cervix or you feel fundal resistance
  • Withdraw the rod (plunger), then the insertion tube
  • Cut the threads, leaving 3-10 cm of string visible out of the cervix

IUD placement - Flexi T®, Mona Lisa N®

  • Ensure the arms of the T sit horizontally (parallel to the floor), and in same plane as the flange
  • Loosen string
  • Set top of flange to sounded measurement
  • insertion tube until flange is at the cervix
  • Remove the insertion tube, rotating slightly and watching the threads
  • Cut the threads at least 3 cm from the cervix

IUD placement - Liberté TT380®, Mona Lisa 10®

  • Insert rod (plunger) and push IUD to top of insertion tube such that tip of IUD is visible at the top of the tube
  • Set top of flange to the sounded measurement
  • Insert until flange is at the cervix
  • Pull insertion tube all the way back, holding the rod (plunger) steady
  • Remove the rod (plunger), then the insertion tube
  • Cut the threads leaving at least 3 cm visible out of cervix